
Vignetting can be added easily in Nuke with a couple of nodes, so what is the point of making a tool for a simple task? My vignette tool is built for ease of use, flexibility, and speed to get the result you want quickly, with a handy preview feature that lets you clearly see the changes you are making to the image.
Before getting into the interface, for this tool to work properly, the resolution of the input must match the root format of your project. This can be done by either hitting “s” in the node graph and changing the ‘full size format’ or adding a reformat node before Vignette.

Once Vignette is connected, set ‘Orientation’ to either Landscape or Portrait, which will place the centre of vignette effect in the correct position.
The default shape for vignetting is a perfect circle to mimic the behavior of a spherical lens. The ‘Squash’ slider lets you change the shape into an oval to act like an anamorphic lens.
‘Softness’ and ‘Falloff’ both control the transition from the outer edge to the centre. They behave slightly differently, so use a combination of both to get the desired effect.
Instead of just making the corners dark with ‘Lightness’, you can opt to give it some color with ‘Tint’ by clicking on the color wheel next to the slider.
‘Mix’ allows you to decrease the amount of vignetting without making changes to the other sliders.
The ‘Preview’ checkbox at the top lets the user test the vignetting on a white background which is very useful.
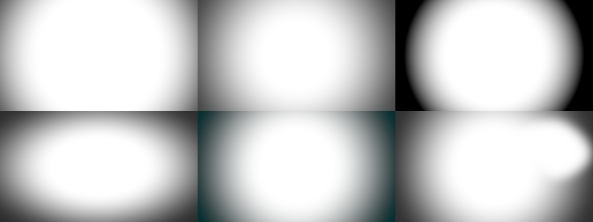
The Mask input of the tool is optional. You probably will not need it most of the time, but there may be some cases where you have something in a corner that is the focal point and you do not want it to be affected by vignette. You can connect a roto shape to the Mask and Vignette will leave untouched whatever is inside the shape. There is no need to add a blur node to the roto, as it is already built into the tool. The bottom-right example in the image above uses the mask feature.
Now to the unnecessarily complicated part (someone please let me know if there is an easier way to share Nuke ToolSets. WordPress won’t let me upload txt or script files), to add the Vignette tool to Nuke, open this page, and you will see a box containing many lines of code. Click on where it says “PlainText” in the top-right corner of the box, and copy-and-paste the entire code to Nuke.

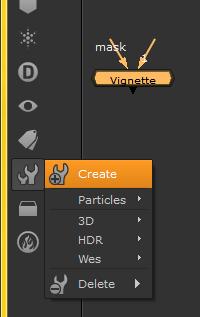
You should now have a working Vignette tool inside of Nuke. To save it for future use, with the Vignette node selected, click on the ToolSet icon that looks like a pair of wrenches, select Create, then give it a name such as Vignette. Now you can open the tool by hitting tab in the node graph and typing whatever name you gave, just like you can with any other nodes.
That’s it! This is the first custom tool I made in Nuke that I thought would be useful for more than just me. When I come up with any other good tools in the future I will be sure to share those as well.
*I learned to make custom tools from Rob Nederhorst‘s ‘ARCHETYPE’ VFX Breakdown DVD. He shows some gizmos he uses and how they are built, which includes a vignette tool. It inspired me to think about what I’d do differently if I were to make one of my own. He is an amazing Vray/Nuke artist, and has some very useful scripts on his web site.
